vMWare Player: Difference between revisions
Jump to navigation
Jump to search
No edit summary |
No edit summary |
||
| Line 62: | Line 62: | ||
* Select the tab '''Options''' and the configuration page '''Shared Folders'''. Follow the example of the image and create a folder that can be accessed by the virtual machine. | * Select the tab '''Options''' and the configuration page '''Shared Folders'''. Follow the example of the image and create a folder that can be accessed by the virtual machine. | ||
* From now on you should perform the installation of Poseidon normally inside the virtual machine. Install [[Perl | * From now on you should perform the installation of Poseidon normally inside the virtual machine. Install [[How_to_run_OpenKore|Perl Interpreter]] and follow [[Poseidon|Configuration Guide Poseidon]]. | ||
[[Image:Vmplayer_11.jpg|1100px]] | [[Image:Vmplayer_11.jpg|1100px]] | ||
Revision as of 10:03, 4 June 2013
VMWare Player
VMWare Player is a free version of VMWare distributed by the press, where it is not necessary to have a license to use the software, Download below:
Install on WIndows
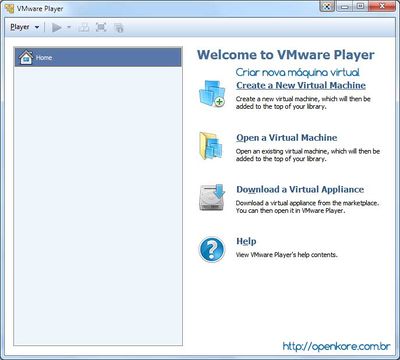
- After the installation of VMWare Player, open the program.
- Click Create a New Virtual Machine. You will see the screen below:
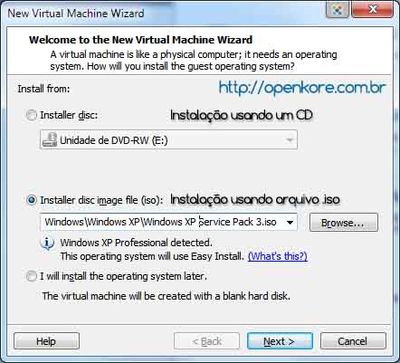
- If you are using a Windows XP CD, select the first option.
- Otherwise select the second, click Browse and select the corresponding iso file Windows installation.
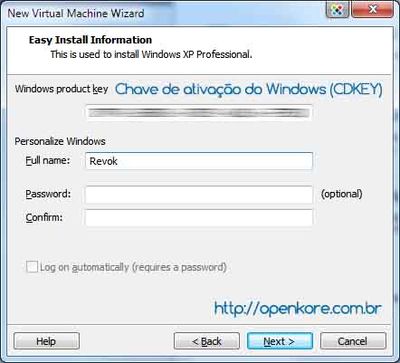
- Enter the activation key of Windows. This key is not provided by Openkore, contact Microsoft if you want to buy your original software.
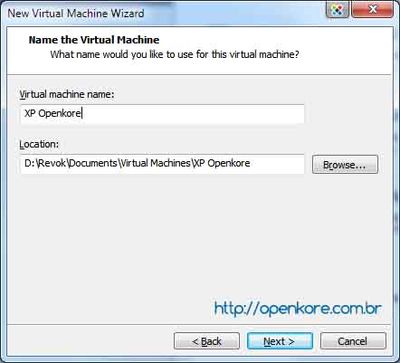
- On this screen you specify the name of your virtual machine and the path where it is located.
- Please select a hard drive that has enough free disk space for the virtual machine.
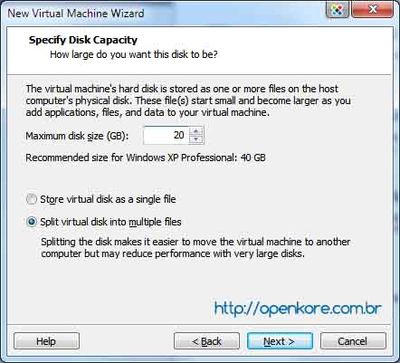
- Maximum disk size is the maximum size of the virtual machine HD. 20GB is a good size if you just want to use bots.
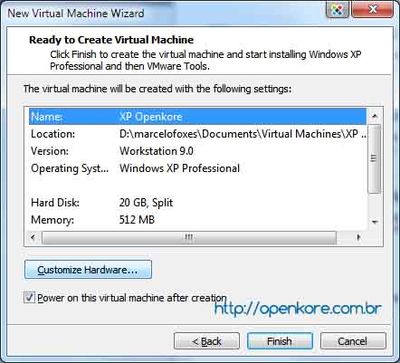
- A brief summary of the properties of your Virtual Machine.
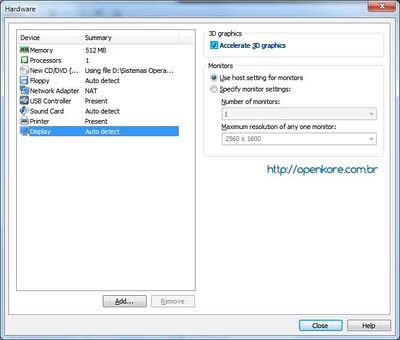
- Now we define the Hardware properties of the Virtual Machine.
- Click Customize Hardware...
- Select the Auto Detect Display and make sure Accelerate 3D graphics' is marked. Click Close.
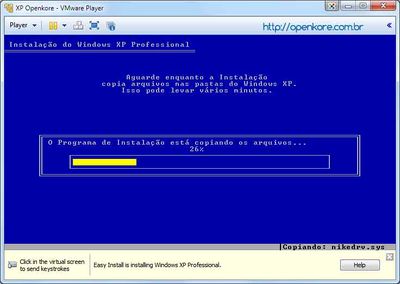
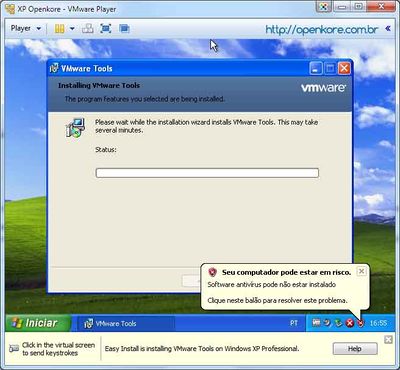
- From now on the installation is automatic. Just wait.
- After the installation of theVMWare Tools is complete you can start using your virtual machine.
Accessing real machine files using the virtual machine
- After the installation of Windows on virtual machine.
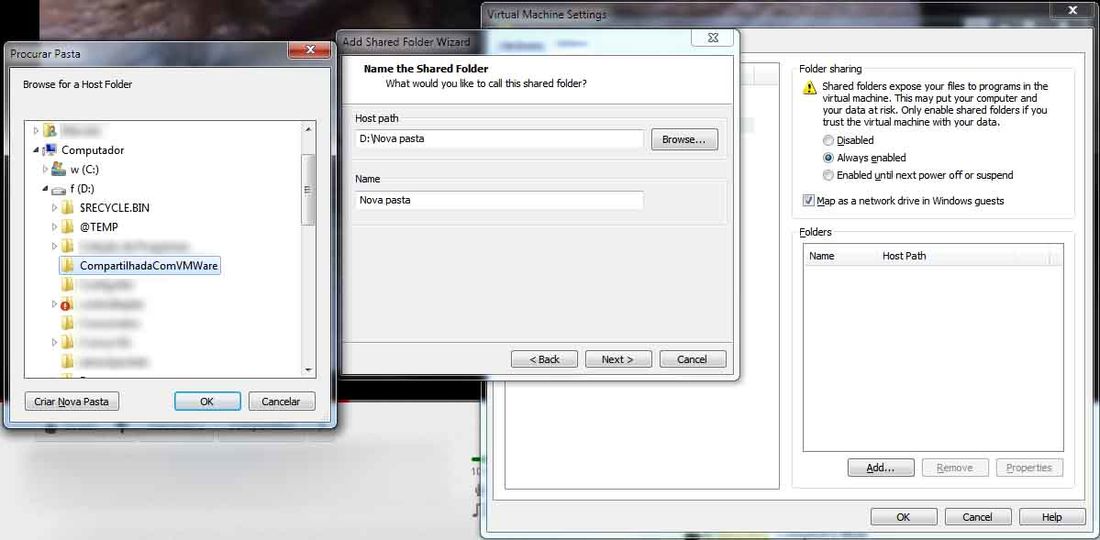
- Click the button Player select Manage and click Virtual Machine Settings...
- Select the tab Options and the configuration page Shared Folders. Follow the example of the image and create a folder that can be accessed by the virtual machine.
- From now on you should perform the installation of Poseidon normally inside the virtual machine. Install Perl Interpreter and follow Configuration Guide Poseidon.
Método alternativo para a instalação do Vmware tools
O VMWare Tools é uma ferramenta essencial para o uso de softwares em 3d como o Ragnarok e o Poseidon para enganar o GameGuard.
- Caso haja algum problema para baixar e instalar, faça o seguinte:
- Caso a guest esiver ligada, desligue do mesmo jeito que você desliga o computador, clicando dentro da guest no botão iniciar > desligar.
- Com a guest desligada
- baixe o Vmware tools para Windows xp aqui e execute ele (observe que ao executar o instalador, nada acontece, e é assim mesmo).
- Agora ligue a guest e o Vmware Player irá pedir para instalar o Vmware tools para Windows xp na versão 8.8.1 e você precisa aceitar.
- Sua guest irá começar a instalação dos drivers de vídeo e mouse para pode rodar aplicativos em 3D (note que ele não irá fazer download de nada por que você utilizou o executável no host onde nada apareceu).
- Após toda a instalação, sua guest irá reiniciar e o Vmware tools estará instalado.
Salvando o estado da máquina virtual
Esta é uma opção relativamente nova no Vmware player e faz com que a guest após dado o inicio do seu desligamento seja salva do jeito que você a tenha deixado e quando a guest for ligada, ela estará com tudo que você deixou já aberto (incluindo o poseidon).
Para ter acesso a essa funcionalidade siga este rápido tutorial:
- clique em "File" e abra "Player preferences...""
- deixe marcada as opções : "Confirm before losing a virtual M a c h i n e", "Return to the VM Library after closing a vitual M a c h i n e" e "Supend the virtual M a c h i n e".
